Friday, June 10, 2016

Crochet Dimmy from Yo-Kai Watch!

Dimmy!


This pattern was created for Lynda-Jayne who was looking for a Dimmy Pattern.  I am not sure if the colors I chose are correct, it seems to vary from image to image, you can use whichever colors you feel match best.  This pattern may be messy and has only been tested by me, so if anything is confusing, feel free to ask or help correct my pattern! Thanks, Natasha (mnopxs2).


I used all worsted weight yarn (you may use whatever you wish tho)  Feel free to use whatever colors you wish, I am just sharing the yarn I used. If you want I can look up the specific yarns I used for each color; I just used yarn I had at home.

Colors:
Purple (Head/Body)
Dark Purple (Body)
Pale Yellow (Eyes)
Black (Face)
Silver/Grey (Face)

Size E-4/3.50mm crochet hook
Polyfil for stuffing
Pipecleaner (optional) for the arms
Cardboard (optional) for base and katana
Scissors
Yarn Needle

*He came out about 7 1/4 inches tall for me (Head to Feet), but that will all depend on how tight or loose you crochet :)

Abbreviations:

ch = chain stitch
st = stitch
SC = single crochet
SC2tog = single crochet 2 stitches together (sc decrease)
sl st = slip stitch


HEAD/BODY

Rnd 1: In Purple, make a magic ring and work 10 SC in the ring, do not join, work as continuous rounds (We are starting at the top of his head)
Rnd 2: 2 SC in each stitch, repeat around (20 SC)
Rnd 3: SC in first st, 2 SC in next st, repeat around (30 SC)
Rnd 4: SC in next 2 sts, 2 SC in next st, repeat around (40 SC)
Rnd 5: SC in next 3 sts, 2 SC in next st, repeat around (50 SC)
Rnds 6-20: SC around (50 SC)
Rnd 21: SC in next 8 sts, SC2tog, repeat around (45 SC)
Rnds 22-24: SC around (45 SC)
Rnd 25: SC in next 7 sts, SC2tog, repeat around (40 SC)
Rnds 26-28: SC around (40 SC)
Rnd 29: SC in next 6 sts, SC2tog, repeat around (35 SC)
SWITCH to Dark Purple yarn
Rnds 30-32: SC around (35 SC)
Rnd 33: SC in next 12 sts, 2 SC in next 4 sts, SC in next 11 sts, SC2tog 4 times (35 SC)
Rnd 34: SC in next 10 sts, 2 SC in next 4 sts, SC in next 11 sts, SC2tog 4 times, SC in next 2 sts (35 SC)
Rnd 35: SC around (35 SC)
Rnd 36: SC in next 5 sts, SC2tog, repeat around (30 SC)
Rnd 37: SC around (30 SC)
Rnd 38: SC in next 4 sts, SC2tog, repeat around (25 SC)
Rnd 39: SC around (25 SC)
Rnd 40: SC in next 3 sts, SC2tog, repeat around (20 SC)
Rnds 41-42: SC around (20 SC)
Rnd 43: In back loops only, SC2tog around (10 SC)
Rnd 44: SC2tog around (5 SC)
Sew up your hole and hide remaining string.


Attach a new round onto the front loops of row 43 that we skipped.
Rnd 1: SC in 1, 2 SC in next st, repeat around (30 SC)
Rnd 2: SC in next 2 sts, 2 SC in next st, repeat around (40 SC)
Rnd 3: SC in next 3 sts, 2 SC in next st, repeat around (50 SC)\
This is going to work in rows back and forth to form the side of his PUDDLE? thing at his base.
Rnd 4: SC in the next 5 sts, turn (5 SC)
ROW 5: Skip the first st, SC in the next 8 SC, turn (8 SC)
ROW 6: Skip the first st, SC in the next 4 SC, turn (4 SC)
ROW 7: Skip the first st, SC in next 2 sts, sl st into last stitch, fasten off.


OPTIONAL!!!  ADDING CARDBOARD/SECOND BASE
If you want to crochet a second base, and add a cardboard piece in between to help stand Dimmy up you can try that.  If you want him just as a plushie you can skip this step.  I added a piece of cardboard to see if it would help him stand.  I just ripped the side panel off of a diaper box I had around.

Rnd 1: In Dark Purple, make a magic ring and work 10 SC in the ring, do not join, work as continuous rounds (We are starting at the top of his head)
Rnd 2: 2 SC in each stitch around (20 SC)
Rnd 3: SC in 1, 2 SC in next st, repeat around (30 SC)
Rnd 4: SC in next 2 sts, 2 SC in next st, repeat around (40 SC)
Rnd 5: SC in next 3 sts, 2 SC in next st, repeat around (50 SC)\
This is going to work in rows back and forth to form the side of his PUDDLE? thing at his base.
Rnd 6: SC in the next 5 sts, turn (5 SC)
ROW 7: Skip the first st, SC in the next 8 SC, turn (8 SC)
ROW 8: Skip the first st, SC in the next 4 SC, turn (4 SC)
ROW 9: Skip the first st, SC in next 2 sts, sl st into last stitch, DO NOT FASTEN OFF, sl st your 2 bases together, inserting your card board in between them.  Fasten off and weave in your tails. 


EYES:
In Silver, ch 13
Row 2: SC in 2nd ch from hook and each st across, turn (12 SC)
Row 3: SC across, turn (12 SC)  Fasten off in Silver but leave a tail for sewing the silver bit to his head.
In Black,
Rows 4-6: SC across, turn (12 SC)  Fasten off, leaving a tail for sewing.
In Pale Yellow sew on some eyes.


ARMS (make 2) Optional-add pipe cleaners into the arms for posing. 

Rnd 1: In Purple, make a magic ring and work 4 SC in the ring, do not join. (We are beginning at the bottom/fingers of the hand)
Rnd 2: SC around (4 SC)
Rnd 3: 2 SC in each st (8 SC)
Rnd 4: SC around (8 SC)
Rnd 5: SC2tog around (4 SC)
Rnds 6-20: SC around (4 SC)
Fasten off and leave a long enough tail to attach to your body.  I added piped cleaners into my arms to make stiffer joints, and then I sewed not only the shoulders to the body, but the hands to the tummy, so that they didn't look weird.  You decide how to make yours!


OPTIONAL!!!  ADDING CARDBOARD KATANA
I wasn't sure how to tackle the Katana, so feel free to change this.  I decided to cut out more cardboard, color with sharpie, then wrap with yarn and sew onto the body.  I am not sure how this will last with my son, so I may try to see if I can find another option... for now I like how it looks.


Now all that is left is putting together your Doll!  Thank you so so so much for reading my pattern!  Hope your project turns out wonderful!  -Natasha (mnopxs2).


  The guys have seen better days! They are well loved by my little one!

Monday, January 18, 2016

Crochet Whisper from Yo-Kai Watch!

Whisper!


My oldest son loves all things Yo-Kai.  Since I have already made him Jibanyan, it was time to make Whisper!  This pattern may be messy and has only been tested by me, so if anything is confusing, feel free to ask or help correct my pattern! Thanks, Natasha (mnopxs2).


I used all worsted weight yarn (you may use whatever you wish tho)  Feel free to use whatever colors you wish, I am just sharing the yarn I used. If you want I can look up the specific yarns I used for each color; I just used yarn I had at home.

Colors:
White (Body/Eyes)
Black (Eyes/Teeth)
Blue (Mouth)

Size E-4/3.50mm crochet hook
Polyfil for stuffing
6mm/.24 IN Black Safety Eyes
Scissors
Yarn Needle

*He came out about 6 inches tall for me, but that will all depend on how tight or loose you crochet :)

Abbreviations:
ch = chain stitch
st = stitch
SC = single crochet
SC2tog = single crochet 2 stitches together (sc decrease)
sl st = slip stitch


BODY

Rnd 1: In White, make a magic ring and work 5 SC in the ring, do not join, work as continuous rounds (We are starting at the top of his head)
Rnd 2: SC around (5 SC)
Rnd 3: 2 SC in next 3 sts, SC in next 2 sts (8 SC)
Rnd 4: SC2tog in next 3 sts, 2 SC in next 2 sts (7 SC)
Rnd 5: SC around (7 SC)
Rnd 6: SC in next 3 sts, 2 SC in next 4 sts (11 SC)
Rnd 7: *2 SC in next st, SC in next, Repeat * ending with 2 SC in last st (17 SC)
Rnd 8: *Sc in next st, 2 SC in next, Repeat * ending with 1 SC in last st (25 SC)
Rnd 9: SC in next 3 sts, SC2tog in next st, repeat around (20 SC)
Rnd 10: *SC in next 3 sts, 2 SC in next st, Repeat * 2 times, In Front Loops only Repeat * 2 more times. (25 SC)
Rnd 11: SC in next 4 sts, 2 SC in next st, repeat around (30 SC)
Rnd 12: SC in next 5 sts, 2 SC in next st, repeat around (35 SC)
Rnd 13: SC in next 6 sts, 2 SC in next st, repeat around (40 SC)
Rnd 14: SC in next 7 sts, 2 SC in next st, repeat around (45 SC)
Rnd 15: SC in next 8 sts, 2 SC in next st, repeat around (50 SC)
Rnds 16-27: SC around (50 SC)
If you want to add your eyes in now you can, pattern will be below.
Rnd 28: SC in next 8 sts, SC2tog, repeat around (45 SC)
Rnd 29: SC in next 7 sts, SC2tog, repeat around (40 SC)
Rnd 30: SC in next 6 sts, SC2tog, repeat around (35 SC)
Rnd 31: SC in next 5 sts, SC2tog, repeat around (30 SC)
Rnd 32: SC in next 4 sts, SC2tog, repeat around (25 SC)
Rnd 33: SC in next 3 sts, SC2tog, repeat around (20 SC)
Fill Whisper with stuffing.
Rnd 34: SC2tog In Back Loops only around (10 SC)
Rnd 35: SC2tog around (5 SC)
Fasten off, sew your hole close.


EYES

In White, make a magic ring and work 6 SC in the ring. Fasten Off leaving tails to attach to the black piece (Make 2)

In Black, ch 7.
Rnd 1: 4 SC in 2nd ch from hook, SC in next 4 sts, 8 SC in end ch, working along the opposite side now, SC in next 4 sts, 4 SC in last ch, Sl St to first SC, (24 SC) leave a long tail for sewing onto your head.

Attach your Safety Eyes through the holes on the White pieces and through the holes on the Black pieces together.  I sewed my White pieces onto my black, but you don't have to.  Then sew the entire eyes piece to the body.  I hope the picture does a better job of explaining it!


MOUTH

In Blue I chained 2 strips of 15 chains and sewed onto his body, for teeth I embroidered some black thread through.  You can change this however you like!


TAIL

Rnd 1: In White, make a magic ring and work 5 SC in the ring, do not join, work as continuous rounds (We are starting at the top of his head)
Rnd 2: SC around (5 SC)
Rnd 3: 2 SC in next 3 sts, SC in next 2 sts (8 SC)
Rnd 4: SC around (8 SC)
Rnd 5: SC in next 4 sts, 2 SC in next 4 sts (12 SC)
Rnd 6: SC2tog in next 2 sts, *2SC in next st, SC in next st, Repeat * around (14 SC)
Rnd 7: SC around (14 SC)
Rnd 8: *2 SC in next st, SC in next st, Repeat * 1 more time, **SC in next 2 sts, SC2tog, Repeat ** 1 more time, SC in last 2 sts (14 SC)
Rnd 9: SC around (14 SC)
Fasten off leaving a long tail for sewing to the body.


ARMS (make 2)

Rnd 1: In White, make a magic ring and work 8 SC in the ring, do not join. (We are beginning at the bottom of the hand)
Rnds 2-3: SC around (8 SC)
Rnd 4: SC in next 2 sts, SC2tog in next st, repeat around (6 SC)
Rnds 5-10: SC around (6 SC)
Fasten off and leave a long enough tail to attach to your body.


Now all that is left is putting together your Doll!  Thank you so so so much for reading my pattern!  Hope your project turns out wonderful!  -Natasha (mnopxs2).


Monday, January 11, 2016

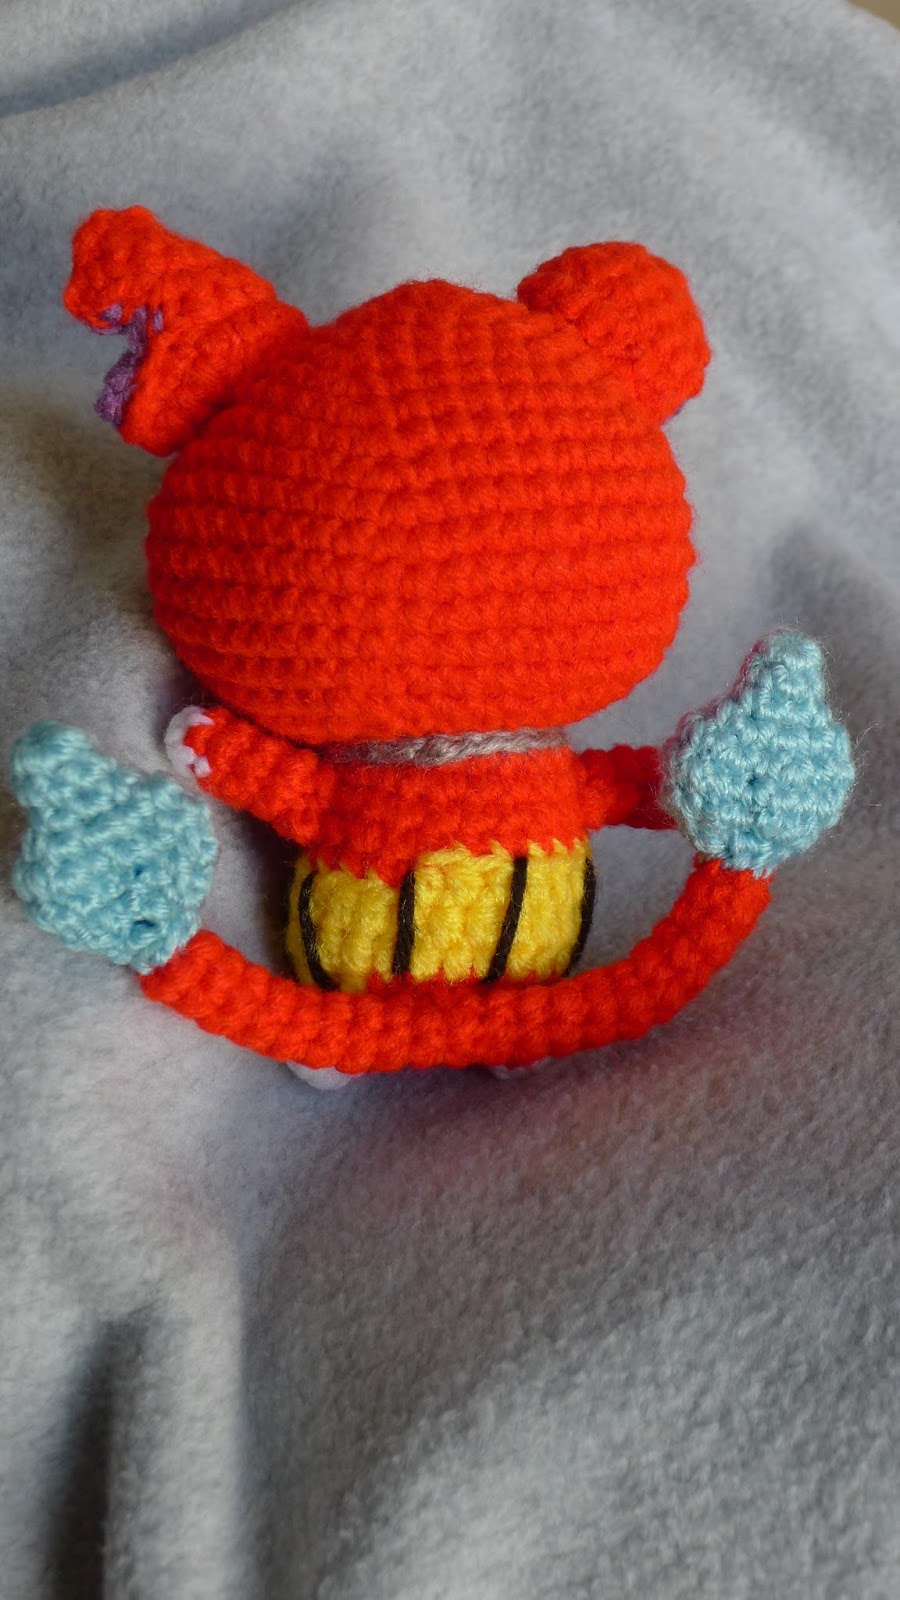
Crochet Jibanyan from Yo-Kai Watch!

Jibanyan!


My oldest son loves all things Yo-Kai.  For his birthday I decided to crochet him Jibanyan, just one of the lovable character from his show.  This pattern may be messy and has only been tested by me, so if anything is confusing, feel free to ask or help correct my pattern! Thanks, Natasha (mnopxs2).


I used all worsted weight yarn (you may use whatever you wish tho)  Feel free to use whatever colors you wish, I am just sharing the yarn I used. If you want I can look up the specific yarns I used for each color; I just used yarn I had at home.

Colors:
Red (Head/Body)
White (Head/Body)
Yellow (Eyes/Belt)
Black (Eyes/Belt)
Pink (Nose/Mouth)
Purple (Ears)
Light Blue/Turquoise (Tail/Bell)
Silver/Grey (Bell)
Blue (Tail)

Size E-4/3.50mm crochet hook
Polyfil for stuffing
Pipecleaner for the Tail
Scissors
Yarn Needle

*He came out about 6 1/2 inches tall for me (Ears to Feet), but that will all depend on how tight or loose you crochet :)

Abbreviations:
ch = chain stitch
st = stitch
SC = single crochet
SC2tog = single crochet 2 stitches together (sc decrease)
HDC= half double crochet
sl st = slip stitch


HEAD

Rnd 1: In Red, make a magic ring and work 5 SC in the ring, do not join, work as continuous rounds (We are starting at the top of his head)
Rnd 2: 2 SC in each stitch, repeat around (10 SC)
Rnd 3: SC in first st, 2 SC in next st, repeat around (15 SC)
Rnd 4: SC in next 2 sts, 2 SC in next st, repeat around (20 SC)
Rnd 5: SC in next 3 sts, 2 SC in next st, repeat around (25 SC)
Rnd 6: SC in next 4 sts, 2 SC in next st, repeat around (30 SC)
Rnd 7: SC in next 5 sts, 2 SC in next st, repeat around (35 SC)
Rnd 8: *SC in next 6 sts, 2 SC in next st, (Repeat * once), SC in next 4 sts, With White SC in 1 st, With Red SC in next st, 2 SC in next st, (Repeat * twice) (40 SC)
Rnd 9: *SC in next 7 sts, 2 SC in next st, (Repeat * once), SC in next 3 sts, With White SC in next 2 sts, With Red SC in next 2 sts, 2 SC in next st, (Repeat * twice) (45 SC)
Rnd 10: *SC in next 8 sts, 2 SC in next st, (Repeat * once), SC in next 4 sts, With White SC in next 3 sts, With Red SC in next st, 2 SC in next st, (Repeat * twice) (50 SC)
Rnd 11: SC in next 23 sts, With White SC in next 4 sts, With Red SC in next 23 sts (50 SC)
Rnd 12: SC in next 22 sts, With White SC in next 7 sts, With Red SC in next 21 sts (50 SC)
Rnd 13: SC in next 21 sts, With White SC in next 9 sts, With Red SC in next 20 sts (50 SC)
Rnd 14: SC in next 19 sts, With White SC in next 13 sts, With Red SC in next 18 sts (50 SC)
Rnd 15: (*SC in next 8 sts, SC2tog), SC in next 8 sts, With White, SC2tog, (Repeat * once), SC in next 3 sts, With Red, SC in next 5 sts, SC2tog, (Repeat * once) (45 SC)
Rnd 16: (*SC in next 7 sts, SC2tog), SC in next 7 sts, With White SC2tog, (Repeat * once), SC in next 4 sts, With Red, SC in next 3 sts, SC2tog, (Repeat * once) (40 SC)
Rnd 17: (*SC in next 6 sts, SC2tog), SC in next 6 sts, With White SC2tog, (Repeat * once), SC in next 5 sts, With Red, SC in next st, SC2tog, (Repeat * once) (35 SC)
Rnd 18: (*SC in next 5 sts, SC2tog), (Repeat * once), With White (Repeat * once), SC in next 4 sts, With Red SC in next st, SC2tog, (Repeat * once) (30)
Rnd 19: SC2tog in next 6 sts, With White SC2tog in next 5 sts, With Red SC2tog in next 4 sts (15 SC)
Rnd 20: SC2tog in next 3 sts, With White SC2tog in next 2 sts, fasten off white, With Red SC2tog in next 3 sts
Sew up your hole and hide remaining string.


EYES:
Rnd 1: In Black, make a magic ring and work 6 SC in the ring, do not join, work as continuous rounds
Rnd 2: SC around (6 SC)
Rnd 3, In Yellow, sl st in the front loops only around (7 sl st to make it look like an even circle), Fasten off and leave tails long enough for sewing onto your head.


Feel free to sew on your mouth and nose however you see fit,  I copied a picture of Jibanyan the best I could!


EAR #1:

In Purple Ch 2
Row 1: 2 SC in 2nd ch, ch 1, turn (2 SC)
Row 2: 2 SC in first st, SC in next st, ch 1, turn (3 SC)
Row 3: 2 SC in first st, SC in next 2 sts, ch 1, turn (4 SC)
Row 4: 2 SC in first st, SC in next 3 sts, ch 1, turn (5 SC)
Row 5: 2 SC in first st, SC in next 4 sts, ch 1, turn (6 SC)
Row 6: 2 SC in first st, SC in next 5 sts (7 SC)
Fasten off, leave a longer tail for sewing to the red piece.

In Red Ch 2
Row 1: 3 SC in 2nd ch, ch 1, turn (3 SC)
Row 2: 2 SC in first st, SC in next 2 sts, ch 1, turn (4 SC)
Row 3: 2 SC in first st, SC in next 3 sts, ch 1, turn (5 SC)
Row 4: 2 SC in first st, SC in next 4 sts, ch 1, turn (6 SC)
Row 5: 2 SC in first st, SC in next 5 sts, ch 1, turn (7 SC)
Row 6: 2 SC in first st, SC in next 6 sts, ch 1, turn (8 SC)
Row 7: 2 SC in first st, SC in next 7 sts (9 SC)
Fasten off, leave a longer tail for attaching to your head, join your purple and red pieces for Ear #1.


EAR #2:

In Purple Ch 2
Row 1: 2 SC in 2nd ch, ch 1, turn (2 SC)
Row 2: 2 SC in first st, SC in next st, ch 1, turn (3 SC)
Row 3: 2 SC in first st, SC in next 2 sts, ch 1, turn (4 SC)
Row 4: 2 SC in first st, SC in next st, ch 3, turn
Row 5: 2 SC in 2nd ch, SC in next 4 sts, ch 1, turn (6 SC)
Row 6: 2 SC in first st, SC in next 5 sts (7 SC)
Fasten off, leave a longer tail for sewing to the red piece.

In Red Ch 2
Row 1: 3 SC in 2nd ch, ch 1, turn (3 SC)
Row 2: 2 SC in first st, SC in next 2 sts, ch 1, turn (4 SC)
Row 3: 2 SC in first st, SC in next 3 sts, ch 1, turn (5 SC)
Row 4: 2 SC in first st, SC in next 4 sts, ch 1, turn (6 SC)
Row 5: 2 SC in first st, SC in next 2 sts, ch 4, turn
Row 6: 2 SC in 2nd ch, SC in next 6 sts, ch 1, turn (8 SC)
Row 7: 2 SC in first st, SC in next 7 sts (9 SC)
Fasten off, leave a longer tail for attaching to your head, join your purple and red pieces for Ear #2.


TORSO

Rnd 1: In Red, make a magic ring and work 8 SC in the ring, do not join.  (We are beginning at the bottom of his torso)
Rnd 2: 2 SC in each st, repeat around (16 SC)
Rnd 3: SC in next st, 2 SC in next st, repeat around (24 SC)
Rnd 4: SC around (24 SC)
Rnd 5: In Yellow, HDC in first loop around (24 HDC)
Rnds 6-7: HDC around (24 HDC)
Rnd 8: In Red, SC in back loop around (24 SC)
Rnd 9: SC in next 8 sts, With White SC in next 6 sts, With Red SC in next 10 sts (24 SC)
Rnds 10-11: SC in next 7 sts, With White SC in next 8 sts, With Red SC in next 9 sts
Fasten off and leave a longer tail to attach it to your head. 


BELL
Rnd 1: In Light Blue, make a magic ring and work 5 SC in the ring, do not join, work as continuous rounds
Rnd 2: 2 SC in each stitch, repeat around (10 SC)
Rnd 3: In Silver,  SC2tog around.  (5 SC)  Sew up your end as best as possible.
In Silver, chain around Jibanyan's neck, attaching one end to the Bell and sewing onto his body.


ARMS (make 2)

Rnd 1: In White, make a magic ring and work 6 SC in the ring, do not join. (We are beginning at the bottom of the hand)
Rnd 2: With Red, SC around (6 SC)
Rnds 3-5: SC around (6 SC)
Fasten off and leave a long enough tail to attach to your body.


LEGS (make 2)

Rnd 1: In White, make a magic ring and work 6 SC in the ring, do not join. (We are beginning at the bottom of the feet)
Rnd 2: With Red, SC around (6 SC)
Fasten off and leave a long enough tail to attach to your body.


I put my body together now before adding my tail.  That is all up to you!


TAIL

For the tail you can either crochet it all first and then add your pipe cleaner into the middle, or as I did, SC around the pipe cleaner.

In Red, ch 5, join together.
Rnd 1: SC in each ch around (5 SC)
Rnds 2-20: SC around (5 SC)  You can make as many rounds as you want for the tail, I made 20 rounds for my Jibanyan's tail.


TAIL ENDS (make 2)

Rnd 1: In Light Blue, make a magic ring and work 6 SC in the ring, do not join. (We are beginning at the tops of the tail ends)
Rnds 2-3: SC around (6 SC)
Rnd 4: 2 SC in each st around (12 SC)
Rnd 5: 2 SC in next st, SC in next stitch, repeat around (18 SC)
Rnd 6: SC around (18 SC)
Rnd 7: SC2tog, SC in next st, repeat around (12 SC)
Rnd 8L SC2tog around (6 SC)

Fasten off and leave a long enough tail to attach to the end of the red tail.  I cut and folded the ends of the pipe cleaner so they won't poke through the yarn so easy.  I attached the Blue Tail ends and the Red Tails sides with a whip stitch around them.  The Picture helps show it off better.  Feel free to sew in some blue fire details on the tail.  Attach to his body at the middle of the tail and middle bottom of his torso.


Now all that is left is putting together your Doll!  Thank you so so so much for reading my pattern!  Hope your project turns out wonderful!  -Natasha (mnopxs2).


Thursday, November 12, 2015

Bernard the Happy Llama

Bernard the Happy Llama


One day I woke up and decided I didn't want to work on any of my other crochet projects, I wanted to make a Llama.  So I did!  Here he is!  Little Bernard!  This pattern may be messy and has only been tested by me, so if anything is confusing, feel free to ask or help correct my pattern! Thanks, Natasha (mnopxs2).


I used all worsted weight yarn (you may use whatever you wish tho)  Feel free to use whatever colors you wish, I am just sharing the colors I used.


*Cream (I used Vickie Howell for Caron SHEEP(ISH) in the color White(ISH))
Less than 1 Skein, or color of your choice.
*Light Green (I used Bernat Baby Coordinates in Iced Mint)
Less than 1 Skein, or color of your choice.
*For his bandanna I used the color Freshly Pressed in Peaches and Cream
Less than 1 Skein, or color of you choice.
*Size E-4/3.50mm and F-5/3.75mm crochet hooks  (Anytime you use the Cream color, use the E hook, when using the Light Green (or furry) color, use the F hook).
Size won't matter too much, the smaller the hook, the smaller your Llama!  
*Yarn Needle
*Scissors
*6mm/.24 IN Black Safety Eyes
*Polyfil for stuffing
*Black Thread and Sewing Needle for making a nose and smile.
*Stitch Marker


Abbreviations:
ch = chain stitch
st = stitch
SC = single crochet
HDC = half double crochet
SC2tog = single crochet 2 stitches together (sc decrease)
sl st = slip stitch


*****(Anytime you use the Cream color, use the E hook, when using the Light Green (or furry) color, use the F hook).*****

Head

Rnd 1: In Cream, make a magic ring and work 6 SC in the ring, do not join, work as continuous rounds but use a stitch marker for your rows. (We are starting at the tip of his nose)
Rnd 2: 2 SC in each stitch, repeat around (12 SC)
Rnds 3-4: SC around (12 SC)
Rnd 5: In Light Green, SC in next st, 2 SC in next st, SC in next 2 sts. In Cream, 3 HDC in next st. In Light Green, SC in next 3 sts.  In Cream, 3 HDC in next st.  In Light Green SC in next st, 2 SC in next st, SC in next st.  (18 SC)
Rnd 6: SC in next 2 sts, 2 SC in next, repeat around (24 SC)
I added my eyes in the middle of the HDC group on each side.  After that I used a sewing needle and added some black thread to make a nose and mouth.
Rnds 7-10: SC around (24 SC)
Rnd 11: SC in next 2 sts, SC2tog, repeat around (18 SC)
Rnd 12: SC in next st, SC2tog, repeat around (12 SC)
Begin stuffing your llama head.
Rnd 13: SC2tog, repeat around (6 SC)
Finish stuffing your Llama, sew the last 6 SC closed.


Ears

Rnd 1: In Cream, make a magic ring and work 6 SC in the ring, do not join, work as continuous rounds but use a stitch marker for our rows.
Rnd 2: 2 SC in each stitch, repeat around (12 SC)
Leave a long tail for sewing onto head.  Fold ears in half and sew the bottoms onto your Llama head, shaping into ears as you go.


Body

Rnd 1: In Light Green, make a magic ring and work 6 SC in the ring, do not join, work as continuous rounds but use a stitch marker for your rows.
Rnd 2: 2 SC in each stitch, repeat around (12 SC)
Rnd 3: SC in next st, 2 SC in next, repeat around (18 SC)
Rnd 4: SC in next 2 sts, 2 SC in next, repeat around (24 SC)
Rnds 5-12: SC around (24 SC)
Rnd 13: SC in next 2 sts, SC2tog, repeat around (18 SC)
Rnd 14: SC in next st, SC2tog, repeat around (12 SC)
Begin stuffing your llama body.
Rnd 15: SC2tog, repeat around (6 SC)
Finish stuffing your Llama, sew the last 6 SC closed.


Neck

In Light Green, leave a long tail for sewing onto head when you make your slip knot on your crochet hook.
Ch 12, join with a sl st to the first ch, careful not to twist the chain.
Rnd 1: SC in each around (12 sts)
Rnd 2: SC in next 5 sts, 2 HDC in next 2 sts, SC in next 5 sts (14 sts)
Fasten off, leave a long tails for sewing onto your body.
Sew 1 side, stuff nicely, then sew the other side together.


*****(Anytime you use the Cream color, use the E hook, when using the Light Green (or furry) color, use the F hook).*****

Legs (make 4)

Rnd 1: In Cream, make a magic ring and work 6 SC in the ring, do not join, work as continuous rounds but use a stitch marker for our rows. (We are starting at the tip of his nose)
Rnd 2: SC in next st, 2 SC in next, repeat around (9 SC)
Rnd 3: SC around (9 SC)
Leave a long tail for sewing onto your body, stuff lightly before sewing.


Tail: Create a very light/bare pompom and attach it to his bottom.  You don't need to do the full bunny effect.  I looked up different tails for Llamas and liked this one best, but you can do it however you want!


Now all that is left is putting together your Llama!  Thank you so so so much for reading my pattern!  Hope your project turns out wonderful!  -Natasha (mnopxs2).


(Optional Bandanna)

Ch 2, 3 SC in 2nd ch from hook, Turn,
Row 2: Ch 1, 2 SC in 1st st, SC in next st, 2 SC in next, Turn (5 SC)
Row 3: Ch 1, 2 SC in 1st st, SC in next 3 sts, 2 SC in next, Turn (7 SC)
Row 4: Ch 1, 2 SC in 1st st, SC in next 5 sts, 2 SC in next, Turn (9 SC)
Row 5: Ch 1, 2 SC in 1st st, SC in next 7 sts, 2 SC in next, Turn (11 SC)
Row 6: Ch 1, 2 SC in 1st st, SC in next 9 sts, 2 SC in next, Ch 7 finish off.
Fasten on at opposite end and Ch 7.  Fasten off.
Now tie his little bandanna on him :)

Crochet Trale Lewous from the "Skittles Song" (Bonus Vending Machine!)

Trale Lewous Doll!


It's finally time to share my pattern for a Trale Lewous Doll!!!  This video was the creation of Nathan Barnatt in which he plays Skittle's fan, Trale Lewous!  This pattern may be messy and has only been tested by me, so if anything is confusing, feel free to ask or help correct my pattern! Thanks, Natasha (mnopxs2).


I used all worsted weight yarn (you may use whatever you wish tho)  Feel free to use whatever colors you wish, I am just sharing the colors I used. If you want I can look up the specific yarns I used for each color; I just used yarn I had at home.

Colors:
White (Shirt Sleeves)
Peach (Skin)
Brown (Hair and Eyebrows)
Dark Brown (Eyes)
Orange (Shorts)
Red (Shoes/Shirt)
Light Pink (Lips)

Black (Vending Machine Windows)
Grey (Vending Machine Window Edges)
Rainbow Yarn (Vending Machine Top)
Red (Vending Machine Bottom)

Size F-5/3.75mm crochet hook
He came out about 6 1/2 inches tall for me, but that will all depend on how tight or loose you crochet 
Yarn Needle
Scissors
Polyfil for stuffing


Abbreviations:
ch = chain stitch
st = stitch
SC = single crochet
HDC = half double crochet
sc2tog = single crochet 2 stitches together (sc decrease)
HDC2tog = half double crochet 2 stitches together (hdc decrease)
DC = double crochet
sl st = slip stitch


Head

Rnd 1: In Peach, make a magic ring and work 5 SC in the ring, do not join, work as continuous rounds (We are starting at the top of his head)
Rnd 2: 2 SC in each stitch, repeat around (10 SC)
Rnd 3: SC in first st, 2 SC in next st, repeat around (15 SC)
Rnd 4: SC in next 2 sts, 2 SC in next st, repeat around (20 SC)
Rnd 5: SC in next 3 sts, 2 SC in next st, repeat around (25 SC)
Rnd 6: SC in next 4 sts, 2 SC in next st, repeat around (30 SC)
Rnd 7: SC in next 5 sts, 2 SC in next st, repeat around (35 SC)
Rnd 8: SC in next 6 sts, 2 SC in next st, repeat around (40 SC)
Rnd 9: SC in next 7 sts, 2 SC in next st, repeat around (45 SC)
Rnds 10-15: SC around (45) Around round 14ish is where I added in my eyes and eyebrows.  I left about 9 stitches in between the eyes.
Rnd 16: SC in next 22 sts, Bobble in the next st (*Yo and insert the hook into the st, pull up a look, yo, pull through 2 loops* repeat 4 more times, yo, pull through all loops on your hook), SC in next 22 sts. (45 sts)
Rnd 17: SC around (45)
Rnd 18: SC in next 7 sts, sc2tog, repeat around (40 SC)
Rnd 19: SC in next 6 sts, sc2tog, repeat around (35 SC)
Rnd 20: SC in next 5 sts, sc2tog, repeat around (30 SC) I embroidered my mouth around rows 19 and 20.
Rnd 21: SC in next 4 sts, sc2tog, repeat around (25 SC)
Rnd 22: SC in next 3 sts, sc2tog, repeat around (20 SC) Begin Stuffing head.
Rnd 23: SC in next 2 sts, sc2tog, repeat around (15 SC)
Rnd 24: SC in next st, sc2tog, repeat around (10 SC)
Rnd 25: Sc2tog around 5 sc (5 SC) Sew up your hole and hide remaining string.


Wig Cap
Rnd 1: In Brown, make a magic ring and work 5 SC in the ring, do not join, work as continuous rounds, use you stitch marker to mark the end of each rnd.
Rnd 2: 2 SC in each stitch, repeat around (10 SC)
Rnd 3: SC in next st, 2 SC in next st, repeat around (15 SC)
Rnd 4: SC in next 2 sts, 2 SC in next st, repeat around (20 SC)
Rnd 5: SC in next 3 sts, 2 SC in next st, repeat around (25 SC)
Rnd 6: SC in next 4 sts, 2 SC in next st, repeat around (30 SC)
Rnd 7: SC in next 5 sts, 2 SC in next st, repeat around (35 SC)
Row 8: SC in next 10 sts, turn (Working Rows for the hair to pop out on the sides)
Row 9: HDC2tog, HDC in next st, SC in next 17 sts, turn
Row 10: HDC2tog, HDC in next st, SC in next 7 sts.
Fasten off, leaving a long tail at the end for sewing onto the head. 


Torso

Rnd 1: In Orange make a magic ring and work 6 SC in the ring, do not join.  (We are beginning at the bottom of his torso)
Rnd 2: 2 SC in each st, repeat around (12 SC)
Rnd 3: SC in next st, 2 SC in next st, repeat around (18 SC)
Rnd 4: SC around (18 SC)
Rnd 5: SC around (18 SC)
Rnd 6: In Red, SC around (18 SC)
Rnd 7-8: SC around (18 SC)
Rnd 9: SC in the next 8 sts, change to Peach, SC in 1 st, In Red finish SC in last 9 sts (18 SC)
Rnd 10: SC in the next 8 sts, In Peach SC in the next 2 Sts, In Red finish SC in last 8 sts (18 SC)
Fasten Off.
In Red, join with a DCto the left of the 2 Peach stitches.  (Kind of crocheting upside-down to form his collar). HDC in the next st, SC in the next 12 sts, HDC in the next st, DC in the Last st.
Fasten Off.
Stuff your torso.
Using Peach yarn, attach your torso to your head.  I also added a tiny bit of white thread to make his shirt look like it had a pocket.


Arms (make 2)

Rnd 1: In Peach, make a magic ring and work 6 SC in the ring, do not join. (We are beginning at the bottom of the hand)
Rnd 2: Sc in the next st, 2 SC in next st, repeat around (9 SC)
Rnd 3: SC in the next st, Sc2tog, repeat around (6 SC)
Rnds 4-6: SC around (6 SC)
Rnd 7: In Red, SC around (6 SC)
Rnds 8-10: In White, SC around (6 SC)
Fasten off and leave a long enough tail to attach to your body.


Legs (make 2)

Rnd 1: In Red, make a magic ring and work 8 SC in the ring, do not join. (We are beginning the bottom of the foot)
Rnd 2: SC in the next st, 2 SC in next st, repeat around (12 SC)
Rnd 3: SC in the next 2 sts, 2 SC in next st, repeat around (16 SC)
Rnd 4: In Peach, SC in the next 2 sts, Sc2tog, repeat around (12 SC)
Rnd 5: SC in the next 4 sts, sc2tog, repeat around (10 SC)
Rnds 6-8: SC around (10 SC)
Rnds 9-10: SC around (10 SC)
Fasten off and leave a long tail for attaching your body.  I added a little white yarn for some shoe details.


Now all that is left is putting together your Doll!  Thank you so so so much for reading my pattern!  Hope your project turns out wonderful!  -Natasha (mnopxs2).


Vending Machine Pattern!!!


I worked this as separate pieces and attached them all together at the end:


Bottom and Top Pieces (1 in Red, 1 in Rainbow Colored Yarn)

Ch 17
Row 1: SC in 2nd ch from hook and each st across, Turn, (16 SC)
Rows 2-8: Ch 1, SC across, Turn (16 SC)
Fasten off.


Front Piece:
In Red, Ch 17
Row 1: SC in 2nd ch from hook and each st across, Turn (16 SC)
Rows 2-6: Ch 1, SC across, Turn (16 SC)
Row 7: Ch 1, SC in next 12 Sts, In the Rainbow Color, SC in 4 sts, Turn (16 SC)
Row 8: Ch 1, SC in next 6 sts, In Red, SC in 10 Sts, Turn (16 SC)
Row 9: Ch 1, SC in next 8 sts, In Rainbow, SC in 8, Turn (16 SC)
Row 10: Ch 1, SC in the next 10 sts, In Red SC in 6, Turn (16 SC)
Row 11: Ch 1, SC in the next 4 sts, In Rainbow SC in the next 12, Turn (16 SC)
Row 12: Ch 1, SC in the next 14 sts, In Red, SC in the next 2, Turn (16 SC)
Row 13-20: In Rainbow, Ch 1, SC Across, Turn (16 SC)
Fasten off.


Back:
In Red, Ch 17
Row 1: SC in 2nd ch from hook and each st across, Turn (16 SC)
Rows 2-20: Ch 1, SC across, Turn (16 SC)
Fasten off.


Right Side:
In Red, Ch 9
Row 1: Sc in 2nd ch from hook and each st across, turn (8 SC)
Rows 2-6: Ch 1, SC across, Turn (8 SC)
Rows 7-20: In Rainbow, Ch 1, SC across, Turn (8 SC)
Fasten Off.


Left Side:
In Red, Ch 9
Row 1: Sc in 2nd ch from hook and each st across, turn (8 SC)
Rows 2-20: Ch 1, SC across, Turn (8 SC)
Fasten Off.


Large Window:
In Black, Ch 9
Row 1: Sc in 2nd ch from hook and each st across, turn (8 SC)
Rows 2-4: Ch 1, SC across, Turn (8 SC)
Fasten Off,
In Grey, SC around the edges.
Fasten off leaving a long tail to sew onto the Vending Machine.


Small Window:
In Black, Ch 9
Row 1: Sc in 2nd ch from hook and each st across, turn (8 SC)
Row 2: Ch 1, SC across, Turn (8 SC)
Fasten Off,
In Grey, SC around the edges.
Fasten off leaving a long tail to sew onto the Vending Machine.

Whip Stitch your vending machine together and stuff it to make it plushie!


Click Here for Brube's Pattern